


A Floating IP is a public IPv4 or IPv6 address that belongs to your organization rather than to a single server. You acquire it from the CubePath pool, assign it to a VPS or bare metal server, and it stays in your account until you release it, so you can use it for an extra website, a separate service or a planned migration. In this guide you will acquire a Floating IP from the CubePath dashboard, assign it to a server and verify that the new address is reachable.
Prerequisites
To follow this guide you need:
- A CubePath account with access to the dashboard at my.cubepath.com and a role that allows managing network resources.
- A positive account balance. Acquiring a Floating IP is refused while the balance is zero or negative.
- A VPS or bare metal server already deployed. Note its location: a Floating IP can only be assigned to a server in the same location.
- SSH access to the server if you want to check the address from inside the operating system.
How Floating IPs work in CubePath
Keep these rules in mind before you start:
| Rule | Detail |
|---|---|
| Location | The IP must be acquired in the same location as the server you assign it to. |
| Types | You can choose IPv4 or IPv6. |
| Limit per VPS | A VPS can hold up to 5 Floating IPs. |
| Billing | Floating IPs are billed monthly, not hourly. |
| Unassign vs. release | Unassign detaches the IP from the server but keeps it in your organization. Release returns it to the pool, and you may not get the same address back. |
Step 1 - Opening the Floating IPs page
Log in to my.cubepath.com. In the left sidebar, go to Network and then Floating IPs. This page lists every Floating IP owned by your organization, with its type, location and the server it is assigned to.
Step 2 - Acquiring a Floating IP
Click Acquire IP in the top-right corner of the page.

A panel opens where you choose:
- IP Type: IPv4 or IPv6.
- Location: the data center of the server you plan to use the IP with.
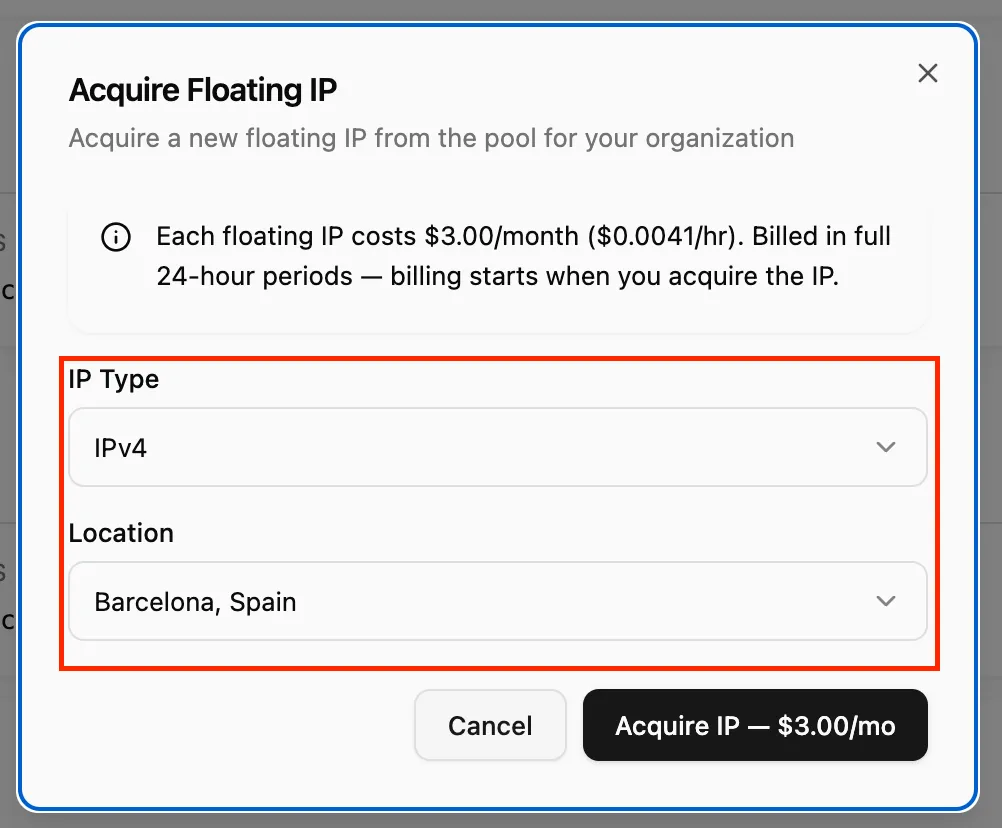
Confirm to acquire the address. The new IP appears in the list with no server attached. Write it down, you will use it as your_floating_ip in the next steps.
NoteBilling starts when you acquire the IP, not when you assign it. Floating IPs are billed monthly, so release the ones you no longer need.
If the panel returns an error instead, check the Troubleshooting section at the end of this guide.
Step 3 - Assigning the IP to your server
Open the server you want to use the IP with from its product page in the dashboard.
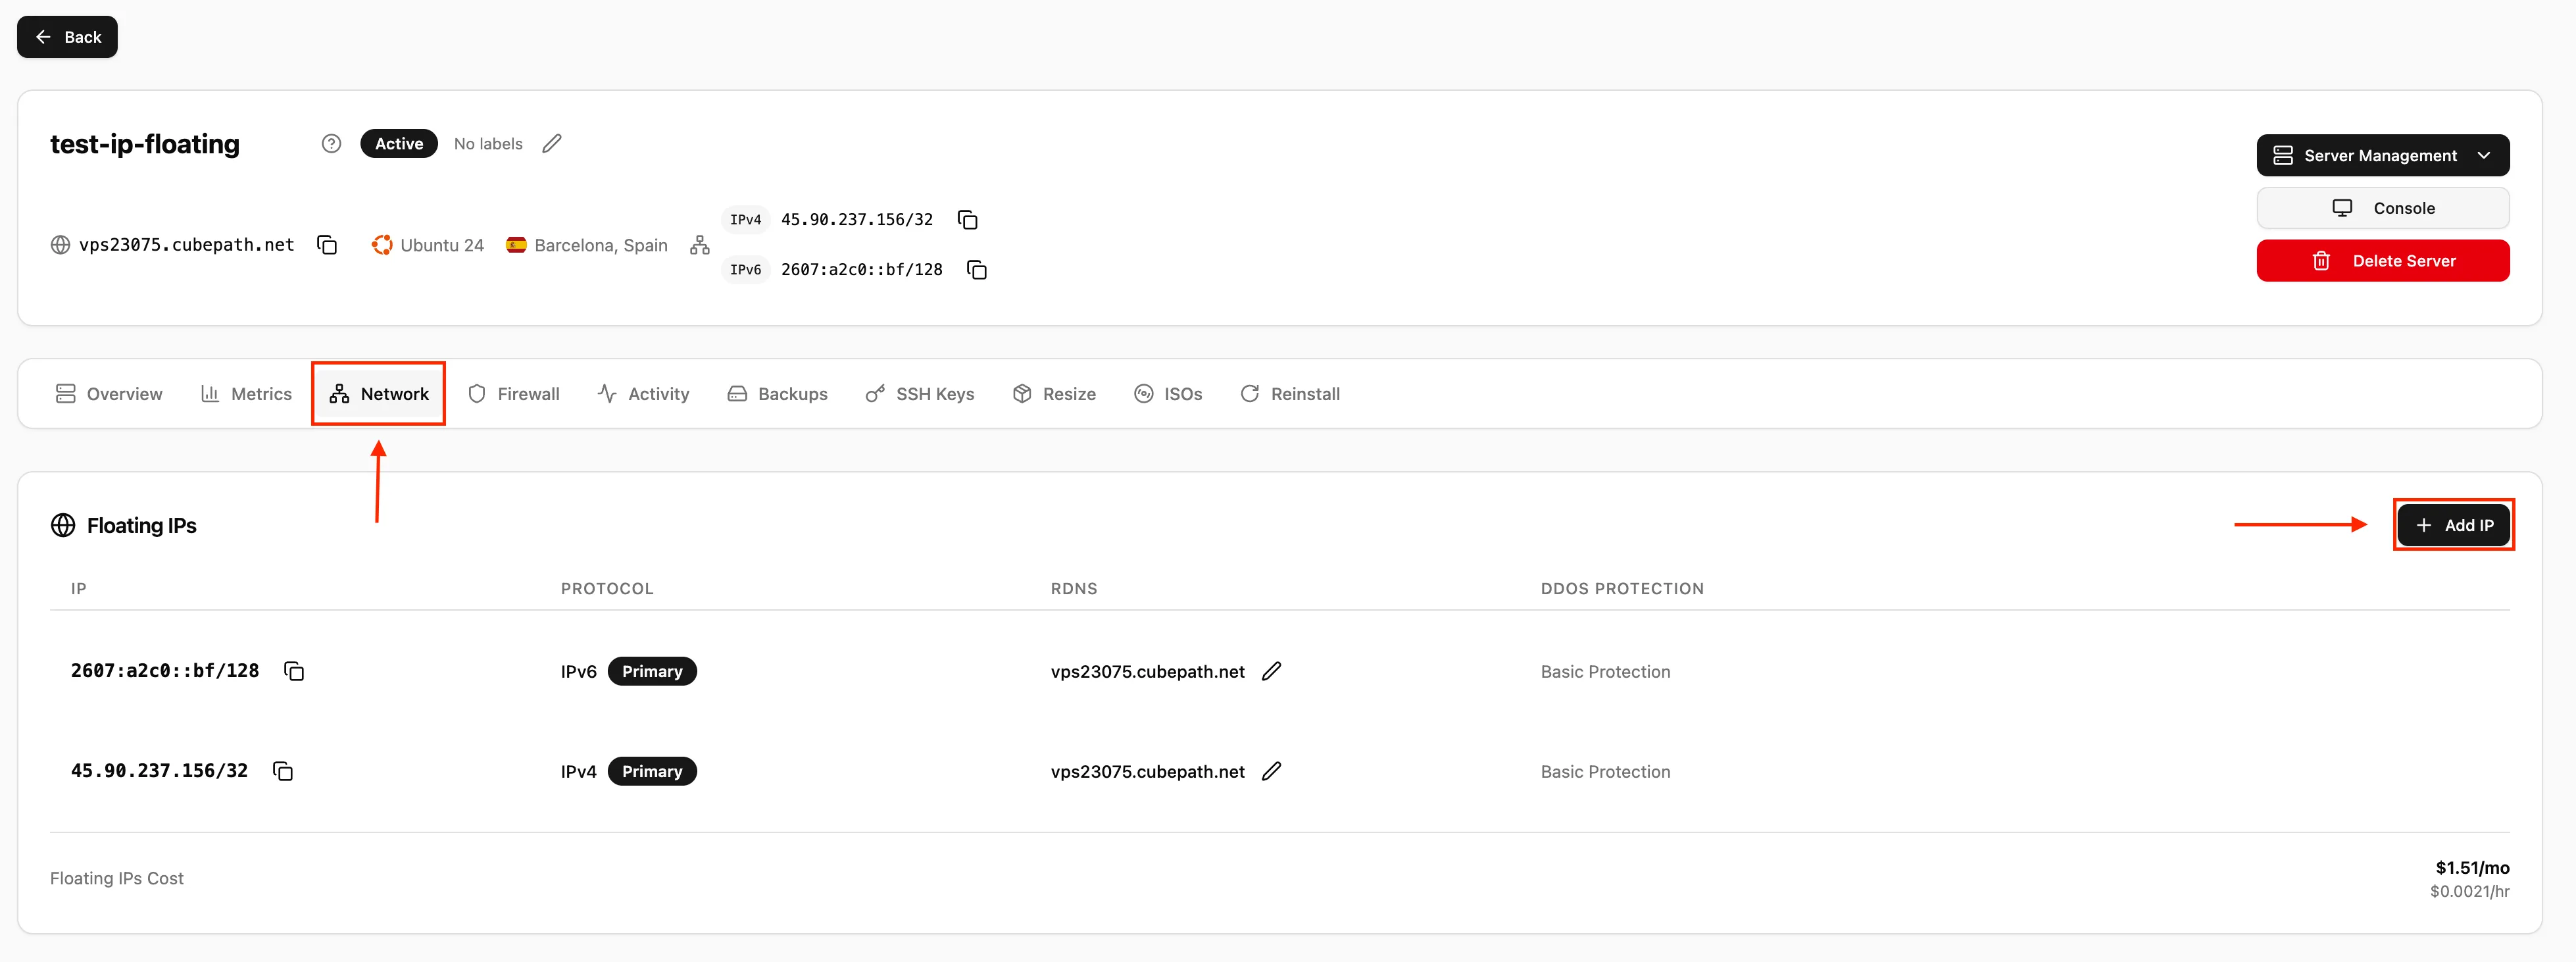
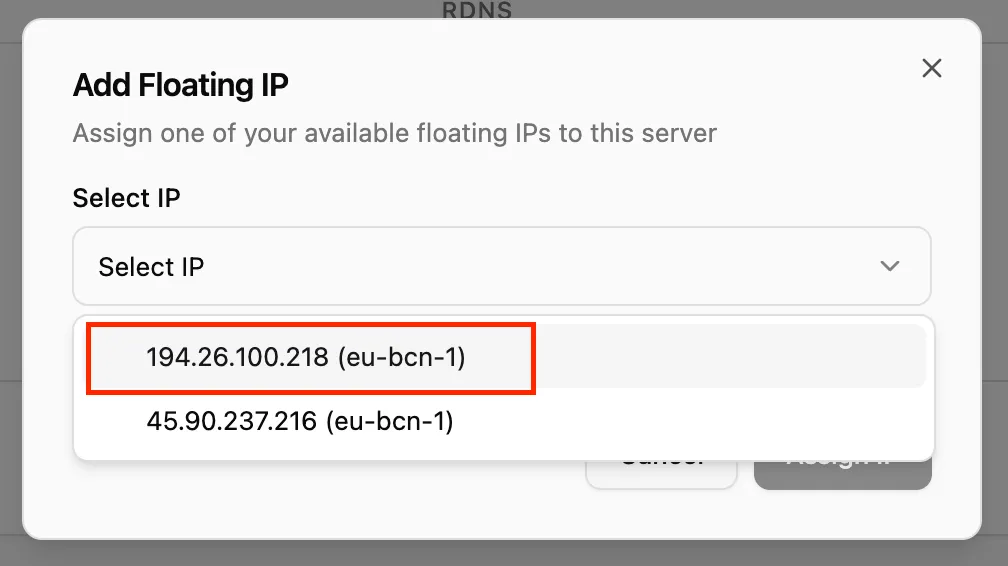
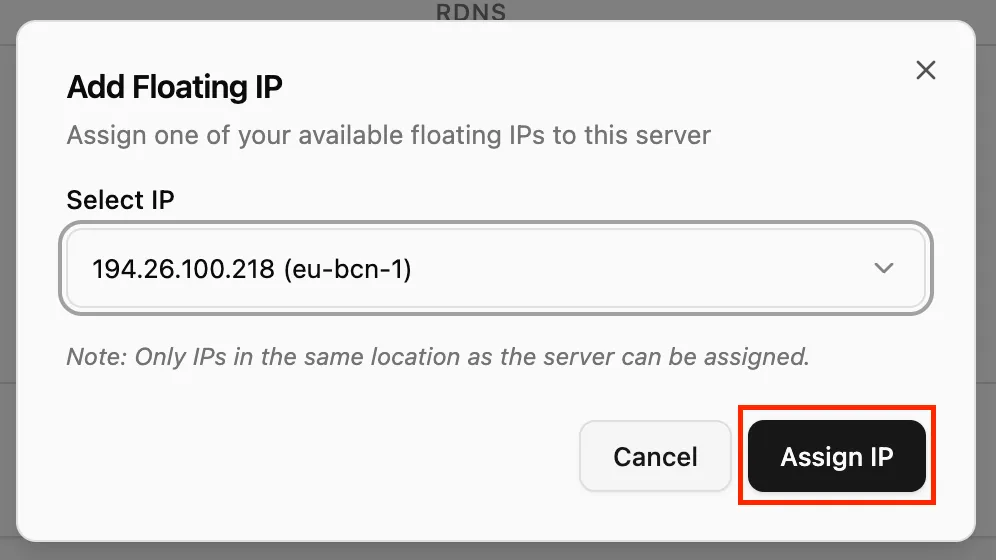
In the server's network settings, select the Floating IP you just acquired and assign it. Only IPs in the same location as the server can be assigned.
Step 4 - Restarting the server to apply the change
On a VPS, CubePath adds the Floating IP to the server's network configuration for you, but the operating system only reads that configuration at boot. Restart the VPS from the dashboard so the new address comes up:
A restart from inside the system (sudo reboot) works too. Until the server restarts, the IP shows as assigned in the dashboard but does not answer traffic.
On a bare metal server, the assignment reserves the IP for that server, but you add the address to the operating system yourself. On Ubuntu 24.04, list the Netplan files first:
ls /etc/netplan/
Open the file that configures your public interface (the name varies, for example 50-cloud-init.yaml or 01-netcfg.yaml):
sudo nano /etc/netplan/01-netcfg.yaml
Add the Floating IP as an extra entry under addresses of the existing public interface, keeping the current address, routes and nameservers as they are. Use /32 for an IPv4 address and /128 for an IPv6 address:
network:
  version: 2
  ethernets:
    eno1:
      addresses:
        - your_primary_ip/your_prefix
        - your_floating_ip/32
The snippet only shows the relevant part; eno1 stands for your actual interface name. Validate the change with netplan try, which rolls back automatically if you lose connectivity and do not confirm:
sudo netplan try
Press Enter to keep the configuration when prompted.
Step 5 - Verifying the Floating IP
First, check from inside the server that the address is configured on the public interface:
ip -brief address
The Floating IP should appear next to the primary address:
lo               UNKNOWN        127.0.0.1/8 ::1/128
eth0             UP             203.0.113.10/32 198.51.100.25/32 fe80::ff:fe12:3456/64
Then test it from your own computer:
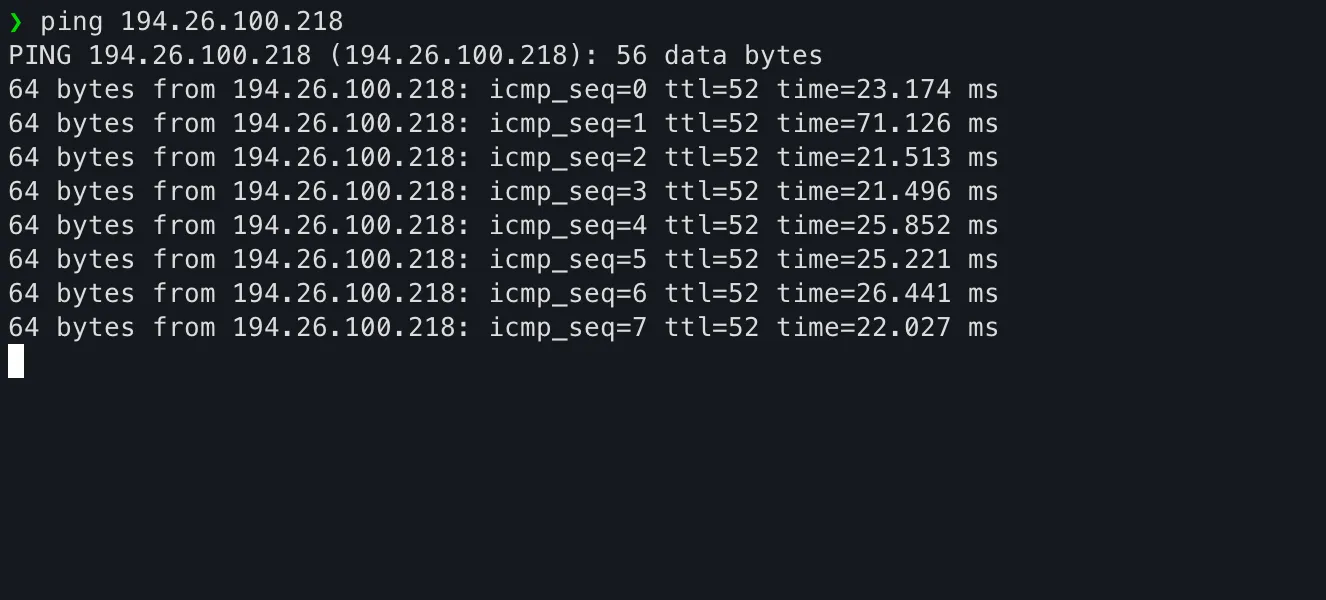
ping -c 4 your_floating_ip
PING 198.51.100.25 (198.51.100.25) 56(84) bytes of data.
64 bytes from 198.51.100.25: icmp_seq=1 ttl=54 time=18.4 ms
64 bytes from 198.51.100.25: icmp_seq=2 ttl=54 time=18.2 ms
...
For an IPv6 Floating IP use ping -6 your_floating_ip, from a network with IPv6 connectivity. If a firewall on the server blocks ICMP, test a service instead, for example ssh your_user@your_floating_ip.
The dashboard also shows the IP as assigned to your server on the Floating IPs page.
Step 6 - Setting reverse DNS (optional)
If you will send email or want a readable hostname in traceroute, set a PTR record for the new IP from the Floating IPs page. Reverse DNS can only be configured while the IP is assigned to a server. Check the result from your computer:
dig -x your_floating_ip +short
mail.your_domain.
Troubleshooting
- "Insufficient balance": top up your organization balance and try again.
- "No available floating IPs in the requested location": the pool for that type and location is temporarily empty. Try the other IP type, or contact support.
- "Floating IP limit reached": your organization reached the number of Floating IPs its tier allows, or the VPS already has 5 assigned. Release IPs you no longer use, or contact support.
- The IP is not listed when assigning it: it was acquired in a different location than the server. Release it and acquire one in the server's location.
- The IP does not answer after assigning it to a VPS: restart the VPS. The address is only applied at boot.
- You cannot unassign the server's main IP: the primary address stays with the server for its whole life and is released when you destroy the server.
Conclusion
You acquired a Floating IP, assigned it to your server and verified that it answers traffic. Because the IP belongs to your organization, you can unassign it and assign it to another server in the same location later without changing the address. As next steps, point a DNS A or AAAA record at the new IP, bind a web server virtual host or a separate service to it, and review the server's firewall rules so the new address only exposes the ports you intend.